Showing posts with label Smoking. Show all posts

Tuesday, March 1, 2011

Recipes: Andouille Sausage


Makes 4 - 8" sausages     Prep Time 45 min     Smoking Time 4 hr

Ingredients
4 lb. pork butts (the fattier the better)
1 tablespoon garlic power
1 tablespoons kosher salt
2 teaspoons black pepper
1 tablespoon crushed red pepper
1 teaspoon cayenne
1 tablespoon paprika
1/2 teaspoon thyme
1/2 teaspoon sage
1 crushed bay leaf

Weston Collagen Casings
Hickory Smoking Chips

Tools
Weston Meat Grinder
Weston Sausage Stuffer
Weston Vertical Propane Smoker

Preparation

First, soak wood chips for at least an hour.

Preheat your smoker to 130 degrees F. Your smoker will take 15-30 minutes to preheat so plan accordingly. Click here for help with using Weston smokers.
Before you start grinding, a few quick meat grinding tips to get you started:
  • Keep your meat and equipment as cold as possible. Not only does this help prevent bacterial growth, it allows the meat to be ground more easily. I like to cool my tray, auger, and plates in the fridge for an hour or two before I grind the meat.
  • I recommend using a kitchen grinder like a #5 or #8 if you regularly grind only small quantities of meat (like for this recipe). I used a #8 - it has a nice, powerful motor and cleanup is quick and easy.
  • Spray your grinder with Weston Food Grade Silicone Spray before use to ensure smooth processing.

Making Andouille Sausage
Cube the pork into 1/2" pieces, then grind first with a coarse plate and then with a medium grinding plate. Mix the pork with all of the seasonings by hand in a Weston Meat Lug or with a Weston Meat Mixer (not necessary for a small quantity of meat as this recipe calls for).


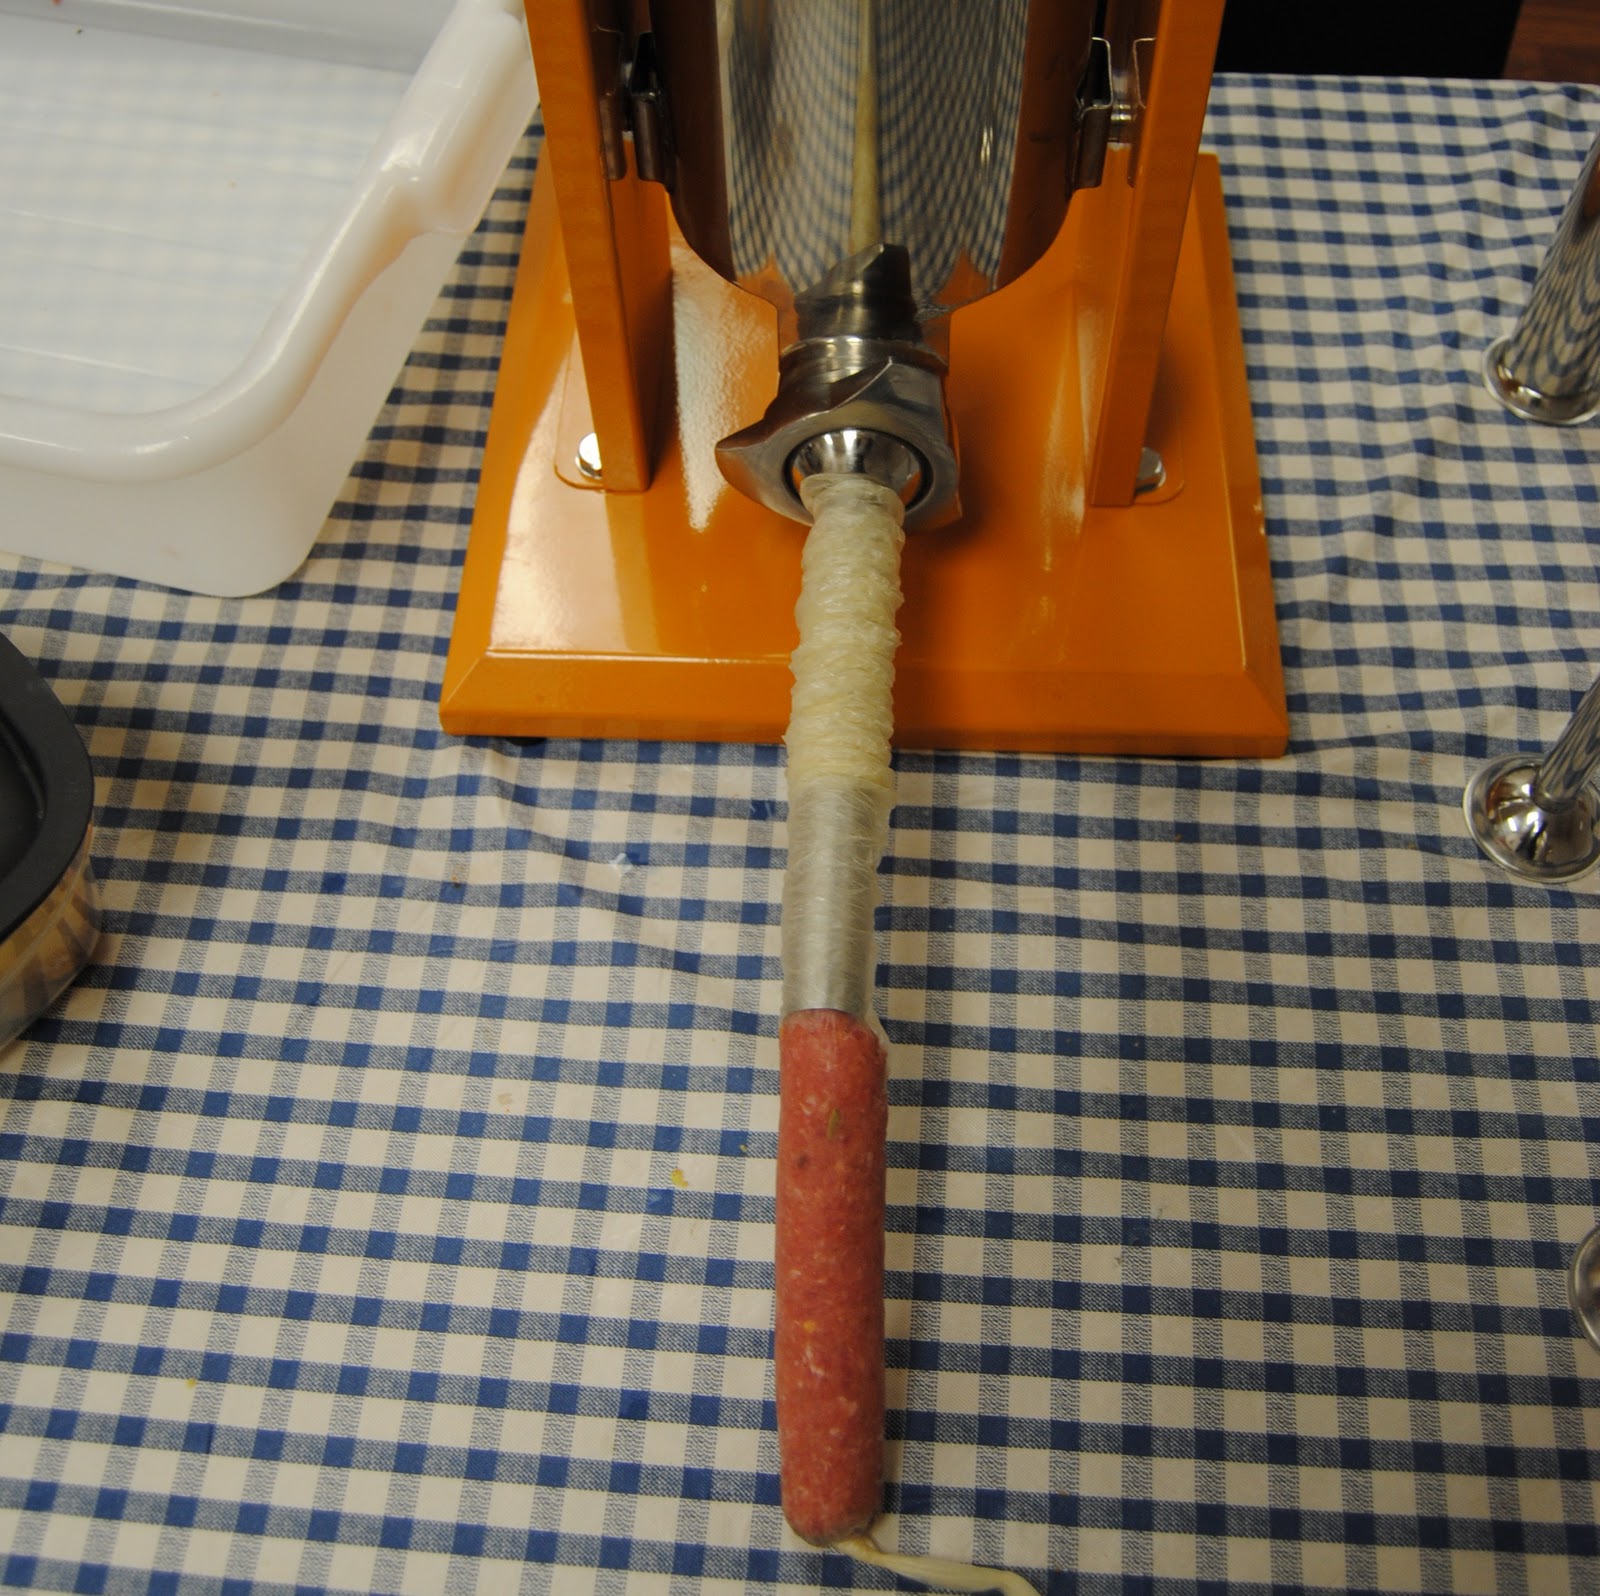
Rinse the casings out by running water through them. Tie a knot in one end of a casing and push onto the funnel of the sausage stuffer (leave an inch or two of casing loose). I used a Weston 7 lb. Vertical Stuffer with a 20 mm stuffing funnel and 32 mm casings. Load the Stuffer by simply tilting out the canister and filling it with the seasoned ground pork. Hold the casing in one hand and turn the handle with the other handle. As the casing fills up, gently move it away from the funnel. Once the casing is filled to the size you'd like your sausage, twist the casing and either tie it in a knot and cut it to make one sausage or continue filling the same casing to make a link of sausages (which is nice for smoking because Weston Smokers have hooks for hanging sausage links).

Once your smoker is preheated, take the wood chips out of their water bowl and place them in the wood chip box. String your sausages onto the hooks or place individual sausages on the racks. Smoke them for an hour and a half at 130 and then increase the temperature to 165 degrees F. After two hours, check the internal temperature of the andouille. If it hasn't reached 155, continue to cook  for 30 min. increments until it reaches 155 degrees F.


Serve sliced over your favorite cajun-style dish.

Wednesday, November 24, 2010

Recipes: Applewood Smoked Turkey with Apple Sausage Stuffing


Applewood Smoked Turkey

Brine Time: 18-24 hr   Prep Time: 45 min   Smoke Time: 4 hr   Serves: 4-6

Ingredients
2 quarts apple juice
5 cups apple wood chips
8 lb. turkey breast
(this recipe can be done with any turkey, really, but the smoking time will change)

For the brine
1 gallon water
8 tablespoons kosher salt

Tools
Weston Propane Smoker
Weston Baking Mat

Techniques
How to Use a Weston Smoker

First, brine the turkey. My rule of thumb is 1 tablespoon of kosher salt to 2 cups of water. It took about a gallon of water to cover my turkey breast, so for this recipe, I'd say your brine should be around 16 cups of water and 8 tablespoons of kosher salt. To ensure your bird is bacteria-free, keep it in its brine for 18 to 24 hours.

Preheat your oven to 375 degrees.

Soak the apple wood chips in water for at least a half hour.

Remove the wood chip box from the smoker and fill the water bowl to the fill line with apple juice. Preheat the smoker to 240 degrees. It takes about a half hour to get it smoking properly so that you can put in your bird. 


Place the turkey breast in the oven for 30 minutes on a Weston Baking Mat. This gets the cooking process started.

Check the smoker's temperature indicator located on the front of the smoker. If it reads 240 degrees, your smoker is preheated, and you can put in the turkey. If it is not hot enough after a half hour, close the dampers more and wait for it to heat up.

Once it is heated, place the woodchips in the woodchip box and carefully place the box back into the smoker. Place the turkey on the lowest rack and tightly close the door. Check on the turkey periodically. It must be at an internal temperature of at least 165 degrees for safe consumption.

How long you smoke your turkey depends on its weight. The rule of thumb is 25-40 minutes per pound. For my 8 lb. turkey breast, I smoked it four hours.

For help with using a smoker, visit the techniques section of the Cooking with Weston Recipe Book.

Slice and serve with Apple Sausage Stuffing.

Apple Sausage Stuffing
Click here for the recipe.

Tuesday, November 23, 2010

Techniques: How To Use a Smoker


These tips are for Weston Gas Smokers.

Before each use, clean and inspect the hose and the connection to the LP cylinder. If there is evidence of abrasion, wear, cuts or leaks, the hose must be replaced before the Smoker is used.

How to Check for Leaks:
  • After all connections are completed, check all connections and fittings for leaks with a soap solution.
  • Open tank valve. The gas hose/regulator assembly should be totally extended to the maximum distance so that the hose is straight and the tank is as far from the smoker as it can be.
  • With all valves closed, apply the leak check solution (50/50 mix of dish washing detergent and water) to all gas carrying connections and fittings.
  • Presence of bubbles at areas of wet solution indicates a gas leak.
  • If leaks are detected or you smell or hear gas, IMMEDIATELY shut off the valve and repair the leak or replace the defective part. Do not use the smoker until all leaks are corrected!
Using the Smoker 

1. Fill the wood chip box with flavored wood chips and place the wood chip box back inside the smoker (in the bottom).

2. Slide the water bowl into the lowest rack position and fill the bowl with water or marinade up to 1 inch below the rim. A full bowl will last for approximately 2-3 hours. Do not overfill or allow water to overflow from the water bowl.

3. Insert or adjust the cooking grids (racks) into the desired rack positions. For better access to the food with tongs or spatulas, make sure the grids run from front to back.

4. Position the smoker so that the back or front of it is against the direction of the wind. If the wind blows toward either of the sides where the dampers are, it will blow the smoke right back out of the smoker.

5. You are now ready to light the burner. There are directions located on the front of the smoker. To light the burner, turn on the propane tank, turn the burner to 'High,' and turn the ignitor, clicking it several times until the burner turns on. Once it's lit, turn the burner to your desired level. The heat from the burner will allow the wood chips to burn, causing the flavoring smoke to accumulate. You do not need matches or a lighter for this step - the smoker has its own ignitor.

6. Adjust the dampers to control the heat. You will want to keep the dampers only slightly open when you are preheating the smoker. This will keep the heat in and allow the smoker to heat up more quickly. Once you put in the food, open the top more to let some of the smoke out. The top damper controls how smoky your food becomes. The side dampers control the heat.

7. Place the food on the cooking grids in a single layer with space between each piece. This will allow smoke and hot moisture to circulate evenly around all the food pieces.

8. Smoking for 2 to 3 hours at the ideal constant cooking temperature of 225°F to 250°F will get the best results. This temperature can be viewed on the heat indicator mounted on the front of the smoker. For more tender and heavily smoked meat, a lower temperature may be preferred. If time is critical, a higher temperature range is recommended.

9. Check water level periodically and add water if low. Never allow the water to completely evaporate. Check the water level at least every 2 hours or as necessary. For best results and to retain heat, avoid opening the door of the smoker while in use. When the door must be opened, only open it briefly. The smoker will quickly resume cooking temperature after the door is closed.

8. Always use a meat probe thermometer (not included) to ensure food is fully cooked before removing it from the smoker.

Additional Tips

  • When setting up the smoker and tank, it is recommended to have the tank and smoker on a line perpendicular to the wind direction.
  • LP tanks are intended for operation in the upright position only.
  • Care should be taken to protect the fuel supply hose from damage from either foot or vehicle traffic.
  • If the appliance is not in use, the gas must be turned off at the supply cylinder and the cylinder should be disconnected from the appliance.
  • Storage of the smoker indoors is only permissible if the cylinder is disconnected and removed from the smoker.